Tag Archives: baking

Pizza Biscuits

I realised today that my hand-scrawled recipe notes for these family favourites were fading so badly that they were becoming hard to read.   Time to commit to a more permanent form of storage….

Mini ChefThere are two variations noted here – the second born out of necessity when I realised, too late, that I’d run out of tomato puree.  Version 1 uses oregano and tomato puree, version 2 – red pesto (no oregano).  I’d go with version 1 first but hey, give it a go and see what you think.  My baking in this is not an exact science so don’t get in a sweat if you don’t have 12 or 18 bics and use your eyes, nose and touch to confirm cooking times in your own oven, especially as, in my experience, all ovens seem to have their own foibles.

(Children love these biscuits so it would be a good opportunity to get them into baking by helping out with the whole making process).

Here we go:

Ingredients (to make approximately 12 to 18, using either a 2-1/2″ or 3″ pastry cutter)

150g (6 oz) flour

100g (4 oz) well-flavoured strong cheese, finely grated (I often use Edam).  Don’t be lazy – buy and grate your own for best flavour.

100g (4 oz) margarine (or butter)

1-1/2 tablespoons of tomato puree (version 1) OR Version 2: 2 well-rounded (generous!) teaspoons of red pesto (I used Sacla ready-made) and if using, you can leave out the oregano

1/2 tsp dried oregano

1/4 teaspoon of dry mustard (i.e. English mustard powder)

1 egg, beaten, to bind and to glaze

Salt and pepper to season

Method

To bake on the middle / top shelves of the oven.  Oven on at 200C / Fan oven 180-190C / 392F / Gas Mark 6.

Sieve flour, salt, pepper and mustard together.  Add oregano (if using – version 1).  Rub fat into the dry /flour mix.  Add the grated cheese and the tomato puree (or pesto).  Add sufficient beaten egg to form a pliable dough (you may not need any if using pesto).

Roll out pastry to about  3mm  or 1/8 inch thick and using a 2-1/2 to 3 inch cutter, shape biscuits.

Arrange on a baking tray, prick well, glaze with beaten egg and bake.

2-1/2 inch biscuits will take approx. 18 – 20 minutes.  3 inch bics take about 20 – 22 mins.

~~~~~~~~~~

These are delicious ‘as is’ but you could always treat them like tiny pizza biscuit canapes and top with a little cream cheese / ham / pineapple / tomato, or sprinkle with paprika pepper.  Let your pizza brain get creative!

Leave a comment

Filed under Cookery

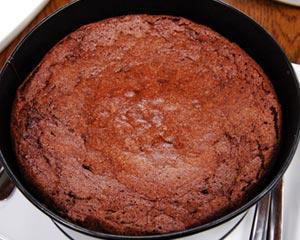
Flourless Chocolate Cake

Flourless chocolate cake


Ingredients

  • 250g good quality dark chocolate, minimum 70 per cent cocoa solids, broken into pieces
  • 125g buter
  • 4 eggs, separated, plus 1 whole egg
  • 175g caster sugar
  • double cream, to serve

Method

 1. Preheat the oven to 180C/ 350F / Gas 4.

2. Melt the chocolate and butter together in a heatproof bowl placed over a pan of barely simmering water (make sure the bowl doesn’t come into direct contact with the water or the heat will be too fierce). As soon as the chocolate is melted, set aside to cool.

3. In a clean, dry, grease-free bowl, whisk the 4 egg whites to stiff peak stage then whisk in 100g of the sugar until glossy.

4. In a separate bowl, whisk together the 4 egg yolks plus the whole egg and the remaining 75g of sugar.

5. Stir the egg yolk mixture into the cooled chocolate mixture then fold in the egg whites.

6. Pour the batter into a ungreased 20cm cake tin.

7. Bake in the oven for 30-35mins or until just set in the centre.

8. Serve warm or cold with double cream.

2 Comments

Filed under Cookery

Chocolate Tart

Choccie eggsWe’re turning ourselves inside out this weekend, preparing for the invasion of workmen in this coming week. It was all to be very organised and properly scheduled but rather typically events have conspired to make several things happen all at once. Never mind – I keep telling myself it will all look fabulous when it’s done!

I’m just dropping by to tell you that I’ve posted the recipe for Rachel Allen’s yummy Chocolate (Easter) Tart over at Voix Douce. If you have more time on your hands than me, it’s well worth doing!

Leave a comment

Filed under Cookery

Chocolate Tart

choc-eggsThis tart is perfect to celebrate Easter but when it comes to chocolate I think most of us agree that anytime is the right time to eat this! 
This recipe (only very slightly adaped) is from Rachel Allen’s excellent book ‘Bake’.

INGREDIENTS

For the sweet pastry:

200g (7oz) plain flour, sifted

1 tablespoon of icing sugar

100g (3-1/2 oz) chilled butter, cubed

1/2 – 1 medium egg, beaten

For the tart:

1 x quantity of sweet pastry (using the above)

175 ml (6 fl oz) double cream

125 ml (4 fl oz) milk

125g (4 -1/2 oz) milk chocolate, chopped

175g (6 oz) good quality dark chocolate, chopped

2 eggs, well beaten

Optional decoration (for Easter) …

250g (9 oz) sugar-coated chocolate eggs, to decorate

Otherwise … a handful of toasted almonds or chopped pecan or pistachio nuts.  

..  ..  ..  ..  ..  ..  ..  ..  ..  ..  ..  ..  ..  ..  ..  ..

You will also need a 23cm (9 in) diameter tart tin

__________________________

Method:

First, make the pastry …  Place the flour, icing sugar and butter in a food processor and whiz briefly.  Add half the beaten egg and continue to whiz.  You can add a little more egg, but not too much as the mixture should be just moist enough to come together.  (If making by hand, rub the butter into the flour and sugar until it resembles coarse breadcrumbs then using your hands, add just enough egg to bring it together).

Then, with your hands, flatten out the ball of dough until it is about 2cm (3/4 in) thick.  Wrap it in cling film or place in a plastic bag and leave in the fridge for at least 30 minutes.  (‘Resting’ the pastry like this is important because it stops it becoming too sticky and reduces shrinking during cooking).

Once the pastry is rested, preheat the oven to 180C  / 350F / Gas mark 4.  Roll out the pastry to no more than 1/4 inch thick (Rachel recommends placing the pastry between two sheets of cling film to do this) making it big enough to line the tart tin.  Bake the tart blind at the above temperature for 15-20 minutes or until the pastry feels dry.

To make the filling …

1.  Heat the cream and milk in a saucepan to boiling point then immediately take off the heat and stir in the chocolate to melt.  Allow to cool slightly for a few minutes, then stir in the beaten eggs.

2.  Pour the chocolate mixture into the baked pastry case and bake in the oven for 15-20 minutes, or until just softly set.

3.  Allow the tart to cool for 20 minutes before removing from the tin.

If serving at Easter time, you can decorate with sugar-coated chocolate eggs.  Alternatively at other times of the year add a handful of toasted hazlenuts to the chocolate mixture and bake as step 2.

2 Comments

Filed under Cookery

Baking ‘blind’

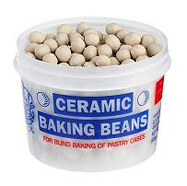
baking-beansBlind baking is done to pre-bake a pastry case before adding a sweet or savoury filling.  The pastry case can be made a day in advance and kept covered until you need it.

To blind bake: Chill the pastry, roll out between two sheets of cling film then use to line your pastry tin.  Then line the pastry itself with a layer of foil, greaseproof or parchment paper, leaving enough to come up the sides of the tin.  Fill with baking beans or dried pulses.

Bake ‘blind’ in an oven at 180C / 350F / Gas mark 4 for 15 to 20 minutes, or until the pastry feels dry.

Remove the paper and beans, brush with a little leftover beaten egg and return to the oven for 2 minutes.  If there are any little holes or cracks in the pastry, just patch it up with any leftover raw pastry before you return it to the oven.

Remove from the oven and set aside in the tin while you make the filling.

1 Comment

Filed under Cookery

All about butter

Butter CurlsI don’t think anything compares to the taste of real butter in cooking. Butter-based spreads have come into existence to try to provide healthier alternatives but they are not always ideal for cooking.  Here is a quick low-down on the basic versions of butter available, plus a few facts and hints:
Salted butter – Salt is a preservative so that the addition of salt to butter gives it a longer ‘shelf-life’.  Salted butter will last about a month in the fridge, six months in the freezer.

Unsalted (or ‘sweet’) butter is the freshest butter available, with an accordingly fresher taste – largely because the natural sweetness of the product isn’t masked by salt.  However, without that extra preservative it will not last as long.

Given the above, good traditional bakers usually opt for unsalted butter in recipes – the flavour is better, there is the option to decide just how much salt should be added, and too much salt tends to produce a tougher dough.  At a pinch (no pun intended), ready salted butter can be substituted in baking recipes, but remember to reduce, or cut out entirely, any extra salt noted separately in the ingredients list.  (If you have to use salted butter in a recipe because that’s all you have, the rule of thumb would be to cut salt by 1/4 tsp for every 4 ounces, or half a cup of butter that is in the recipe).

Light / reduced calorie butter is made with half the fat of regular butter and in order to approximate the consistency of the full fat version, water, skimmed milk and gelatin are added.   As a consequence, it will give different results when used for baking and frying and is therefore not recommended.

In some countries whipped butter is also available.  Its’ whipped texture makes it lighter and more spreadable but the process of whipping means that it is actually 30 – 45% air.  For this reason it also is not generally  recommended for baking.

When frying and sauteing,  it is better to use unsalted butter.  If you wish, the addition of just a teaspoon of oil will allow you to heat the oil to a slightly higher temperature before it begins to burn but both salted and unsalted butter have low smoke points (the point at which the butter burns).

Clarified butter is used widely in fine cuisine as the basis for sauces and, as most of the milk solids and water is removed during preparation, allows for cooking at higher temperatures without burning (useful for frying and sauteing) . 

To clarify: gently melt a quantity of butter in a pan and, using a metal spoon, skim off the solids that begin to foam up on the surface.  Be careful not to allow the butter to burn. When you feel you’ve removed as much as you can, pour the melted butter through a sieve which has been lined with cheesecloth or muslin, into a bowl beneath.  (These solids can be thrown away but are also considered a delicacy in Northern Indian cuisine, being eaten with unleavened bread). The clarified butter in the bowl will last in the fridge for up to a month.

Ghee is very similar to clarified butter, the differences being that all the water content has been evaporated off, all the milk solids removed and the remaining butter has been allowed to brown slightly, giving the ghee a nutty flavour.  Pure ghee will keep at room temperature for months and, as with clarified butter, can be heated to high temperatures.  The process of preparation has removed casein, lactose protein (often a problem to those with allergies) and oxidised cholesterol, whilst still retaining valuable vitamins.  Its’ more intense, nutty flavour also means that you will probably use less of it in cooking.  Ghee is available in Indian and Middle Eastern grocery stores, as well as in some supermarkets.

~~~~~~~~~~~~~

  • Butter absorbs the flavours around it so is best stored in an airtight container or wrapped carefully in foil.
  • Store in the coolest part of the fridge (which is generally not the door)
  • To soften butter quickly for baking, cut into small cubes and leave at room temperature.
  • Frozen unsalted butter can be grated into pastry mix for a nice, light and flaky crust

Leave a comment

Filed under Cookery

Cake Wrecks

I saw this set of photos in UK newspaper The Daily Telegraph, compiled from award winning blog Cake Wrecks (when professional cakes go horribly, hilariously wrong). 

My favourite, I think, is the one below…what on earth were they thinking?!!

Baby cake

Leave a comment

Filed under Smile / Humour, web memorabilia

Lemon Drizzle Cake

This is a lovely cake for those of us who like quite plain cakes, in other words no cream and other frou frous.  Perfect for afternoon tea…although you may want more than one slice, and that just might spoil your dinner!

I make this using a food processor, and this is how it goes …

LEMON DRIZZLE CAKE

Lemon Drizzle CakeMakes a cake for 8-10 servings and is best eaten freshly baked, although it will keep for 1 week under refrigeration in an airtight container.  Freezes up to 3 months.

Ingredients

2 large eggs

175g (6oz) sugar

150g (5oz) soft butter

Grated zest of 1 lemon

175g (6 oz) self-raising flour, sifted***

125ml (4fl oz) milk

A pinch of sea salt

For the lemon syrup

150g (5oz) icing sugar

50ml (2 fl oz) fresh lemon juice (about 1-1/2 lemons)

*** Re Self-raising flour (For American readers) – self-raising flour is simply flour to which raising agent has already been added.  There are several ‘recipes’  for making your own self-raising flour.  Here is one: For every 225g (8 oz) of plain /all purpose flour add 2 level teaspoons of baking powder.  Sift together 3-4 times to thoroughly mix.  Can be stored in an airtight container.

You will also need a 9 x 5 x 3 inch loaf tin for this recipe, together with a small amount of baking parchment or greaseproof paper

………………………………………………………………………………………………………………………………………………………

Method

Pre-heat the oven to 180C / 350F / gas mark 4.

Line the bottom of a well greased loaf tin with baking parchment.

Put the eggs and sugar in the bowl of the food processor and process for 2 minutes, scraping the sides down once with a rubber spatula.  Take off the lid and drop spoonfuls of the soft butter on top of this mixture, together with the lemon zest, then pulse until it disappears.  The mixture should now resemble mayonnaise.

Add the flour, milk and salt, cover and pulse just until the mixture is smooth in texture and even in colour, scraping the sides down with a rubber spatula if necessary.  Don’t over-beat or the cake will be tough.

Spoon the cake mixture into the prepared tin and bake for 45 minutes, until golden brown on top and firm to the touch.

Remove from the oven and stand the tin on a cooling rack.

To make the syrup: Gently heat the sugar and lemon juice in a small saucepan, stirring until a clear syrup is formed – about 3 minutes.  Do not boil.

Prick the warm cake all over with a fork, then gently pour the syrup over it, until it has been completely absorbed.

Leave until cool, then carefully ease the cake from the baking tin and remove the baking parchment.

Just before serving, sift a little more icing sugar on the top.

Serve in generous slices!

~~~~~~~~~~~~~~~~~~~~~~~~~~~~~~~~~~~~~~~~~~~~~~~~~~~~~~~~~~~~~~~~~~~~~~~~~~~~~~~~~~~~~~~~

You can read my personal blog here

5 Comments

Filed under Cookery, What's Cooking?

Cooking dilemmas: Plain / All purpose / Self-raising flour

What now?!Anyone who bakes fairly regularly has probably come across a situation where your recipe calls for ‘self-raising flour’ and all you have is plain.  (Plain flour is ‘all purpose flour’ in the United States).  Self-raising flour is simply flour to which raising agents have been added during the packaging process.  So…to make your plain (or all purpose) flour into self raising flour:

UK VERSION:

Add 1-1/4 level teaspoons of baking powder to every 8 oz of flour (and a pinch of salt if your recipe doesn’t already include that).  Sieve well to mix before adding to your recipe.

US Version:

Add 1-1/4 level teaspoons of baking powder to every cup of all purpose flour (and a pinch of salt if your recipe doesn’t already include that).  Sieve well to mix before adding to your recipe.

To reverse the situation, i.e. you have self-raising flour when what you need is plain flour, use self-raising but reduce the baking powder and salt that it states in the recipe.

1 Comment

Filed under General house tips, What's Cooking?